Archive for Wrzesień, 2014

30/09/2014

Summer reminiscences.

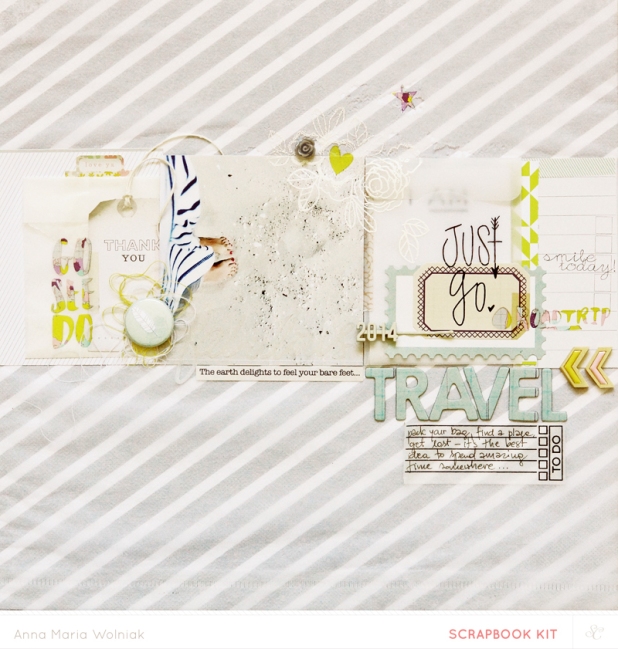
To be true I still some projects made with ‚The Underground’ kits which I didn’t show you during the reveal. I decided to post only these autumnal ones and leave other for the next post. Of course October kits are fabulous for all ‚fall feeling’ projects, but they are also great for summer photos! Today I show you one of the summerish ‚The Underground’ pages I made before the reveal time.

just go

I was inspired by these awesome rub-ons from the ‚King’s Cross’ scrapbook add-on. I found few simmilar yellow shades in the other ‚Piccadilly‚ and ‚Notting Hill‚ addons. I grabbed them all together, mixed with one of my favourites blue/gray colour and some other, neutral details.

just go 4

I encourage you to watch at the project in details, they are not very visible when you are looking at the whole layout. The elements are so subtle so it’s hard to see them at the first sight. I covered the pattern paper using an old ‚paper material’ (I don;t know how you call it in English, but this is kind of fabric made with paper, I took it from my latest ZARA order), I used this extraordinary flower stamps designed by Kim and embossed it using white ZINK powder from the SC shop.

just go 1

I collected here all my favourite elements like vellum phrases (can you see it? at the bottom of the photograph…) and vellum poscket, exclusive stickers and this fancy ‚2o14’ clip…

just go 2

… and of course the brad with a feather, oh, so lovely! Thank you so much for spend your free time here and watch the details :* As you can see, ‚The Underground’ kits are not monotonous, I was just concentrate on my fallish photos and I stuck in a autumnal palette. Hope that all of you will find something interesting for yourself among these sets.

27/09/2014

‚The underground’ reveal.

attempt1

Please welcome October’s sets combined by Studio Calico – ‚The Underground‚ presale for subscribbers is here!!! I could write a lot about these kits as always but I think that posting the projects is a better idea. You may think that I make a lot simmilar pages but I decided at the begining of my work that I want to stay in an autumn mood in all of them. Mainly – these are not my colours, not even the shades are my favourite ones, but… I really love fall so this month’s digitals, Marcy’s cut files and printables gave me a whole bunch of possibilities to create something nice. I would like to share them with you today.

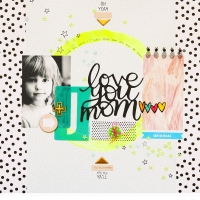
like maybe you are magic

Starting with [Main Kit Only] projects. On this layout I used a digital template designed by Paige Evans to create a stitching stencil. I combined few papers in palette from the photo (yep, the old one with ‚hair’, but I love it and I think the mood of a ‚gold fall’ here is just perfect), and I used brand new, exclusive and amazing silkscreen from the main ‚Underground’ and exclusive GOLD acrylic Color Theory paint to make this print! To be true – these gold shades look fabulous in reality, I can’t make the perfect photo to show you the real effect, what a loss…

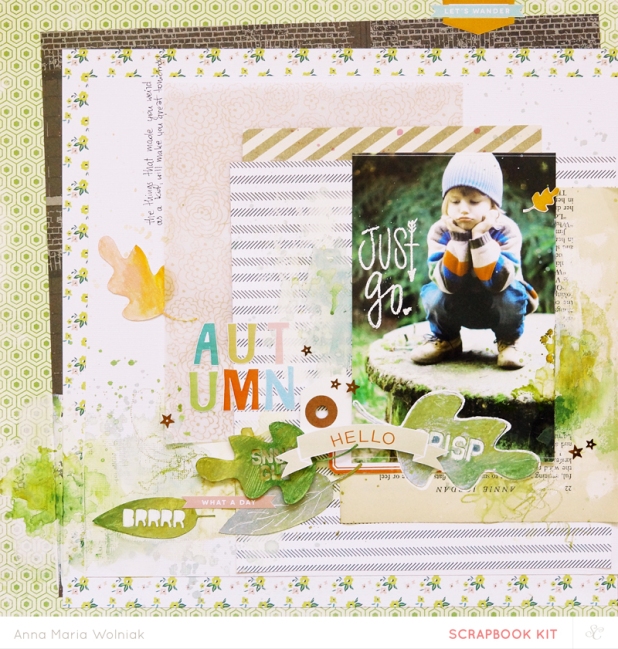
autumn leaves

This is a perfect project to show how you can mix various media. I used here: neocolors, acrylics, watercolours, mists, sprinklers, ecolines and peerless watercolours… oh and white uni-ball pen! ha! everything on a gesso base – one of my favourites. You can also find here lots of layers – diffirent patterned papers from the main kit, exclusive vellum with metallic, floral print. I was palying with these cute cut file leaves designed by Marcy Penner and some of her printables as well. Oh, and I embossed the stamp on the photo! Oh my, I had no idea that I made so many things out there! And of course the photo – I know, I know – this is soooooo cute 🙂 It would be great if he could be such lovely forever!

you are loved

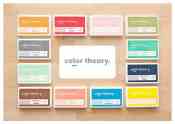
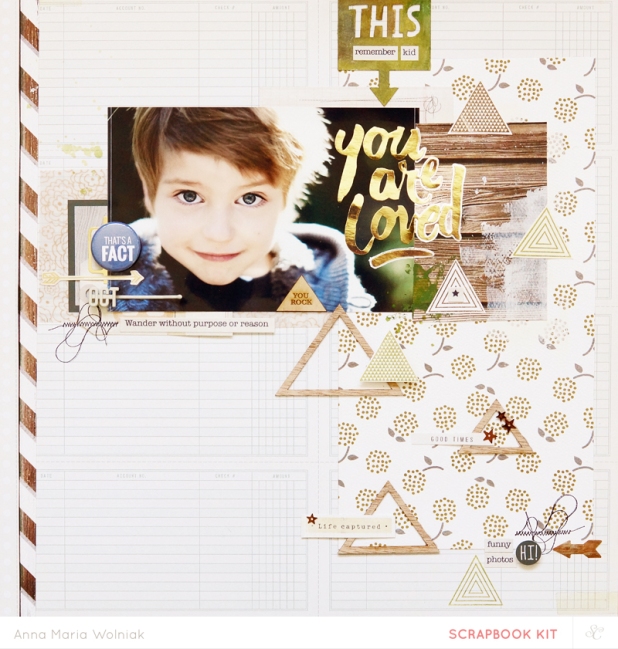
This is the first project where I mixed the main ‚Underground’ kit with it’s add-ons: Piccadilly, Notting Hill and King’s Cross. I was palying with this set of exclusive, fancy wood veneer triangles and stamps! I have to admit that a bundle of Color Theory ink pads was never such helpful before! I mixed wooden brown with jade green and navy shades and I added a pop of gold to finished the effect of perfect autumn palette here.

hello fall

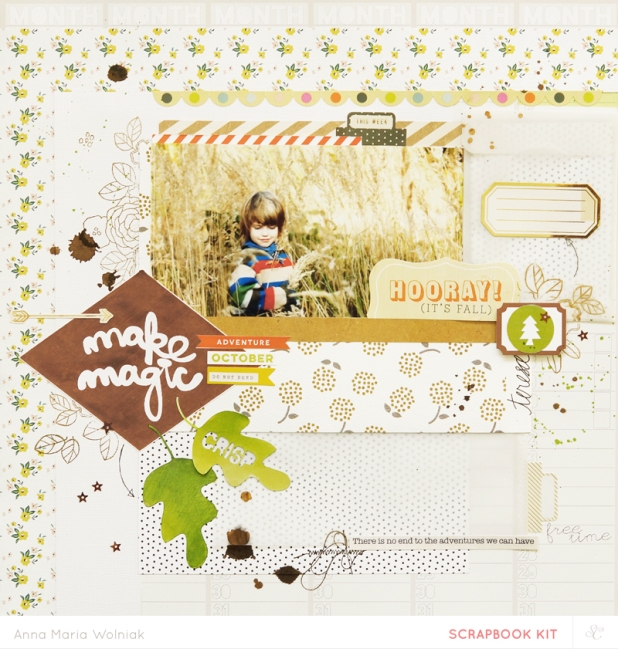
Once again I used the ‚make magic’ silkscreen from the main kit to create a print. Layers, mix of pattern papers and vellum, some gold pops and stamping leaves – all of these elements created a nice, fallish page. Hope you feel the same smell of autumn in the air as I 🙂 it was a nice time spend with the ‚Underground’ kits, now it’s your turn guys!

17/09/2014

‚Underground’ sneaks!

We are oficically welcome fall with October ‚Underground’ Studio Calico kits. This is serious – I stuck among  the autumnal photographs I made previous years. I had to use something old because in Poland we still have a summer weather and I really wanted to create something seasonal this time.

Starting with my monthly subjective mood board (once again – all the pictures are coming from my Pinterest boards).

Octobrrrr mood board

I felt so inspired by these autumn colours that my wish was to create something with lots of fall leaves, gold and dark green shades… it’s only few days till reveal so I won;t be writing a lot about it now. I just past few sneaks – all of them are in the autumn mood, but I also made something typical summerish.

autumn 1

like maybe 1

youe are 2

If you are interested in other sneaks peek photos check out THIS POST at the Studio Calico message board. I will be updating it in a few days with various close-ups.

+     +     +

One more thing – this month’s exclusive offer for SC subscribers is really fab! I’ve already preordered these transparent cards and waiting for them impantiently 🙂

transparencypaperpad_1

Clearly, this is just what you’ve been looking for. We all need is a little more adventure in our lives, and this paper pad full of bright gold and bold white graphics on transparent sheets suits our fancy. The beautiful, large gold and white lettering paired with unique contrasting graphic designs in this Clearly Awesome Transparency Pad make for the perfect combination, and its 4×6″ size makes it a worthwhile choice for most any project. We hope you agree that it’s the obvious choice to add that extra touch of luxury to your projects. Craft in style. And stay golden.

05/09/2014

‚Suit & Tie’ mini album.

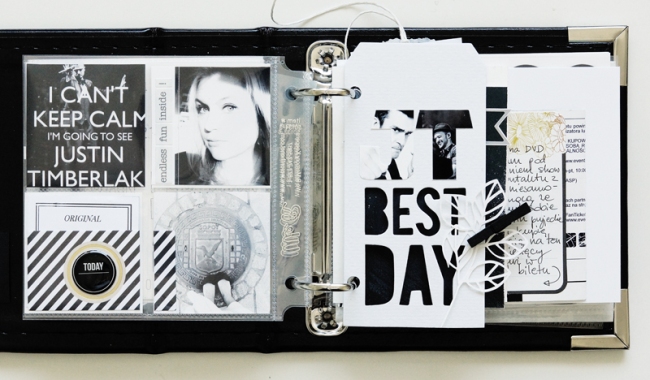
It was a super-duper night and awesome day spent at the seaside in August. Me, my hubby and our two friends were visiting our favourites Polish cities, ate a delicious lunch at the beach but what is the most important, the aim  our trip was AMAZING Justin Timberlake’s and The Teneessee Kids’s concert at the one of the most beautiful Polish stadium in Gdańsk. I took lots of pictures during whole day (from early, wake-up hours will late night at the concert), and I decided to create an album with them.

JT's album by Anna-Maria

From the very begining of my work I knew, that I would like to keep this project in black & white [suit & tie ] mood, it was so obvious to me regarding the set design and graphic design of this World Tour. The idea was great, I had a bunch of photos and great memories, inspiration was boiled inside me and… I bought this sweet 4×4 mini album at SC shop! There was one more thing which forced me to try to keep these special memories in the album – earlier last month I signed up for Marcy’s ‚MINI BOOK’ class, so I was sure that even if my creative mood will gone, I will find an inspiration in her pdf’s. When you enroll to the SC class you usually get an exclusive digital set and I have to admit, that it is one of the greatest things which I adore. Marcy’s printables were so RAD! I printed them on a vellum (as Marcy did) and I was adding them everywhere in my mini.

00Anna-Maria

01Anna-Maria

02Anna-Maria

03Anna-Maria

04Anna-Maria

05Anna-Maria

06Anna-Maria

07Anna-Maria

08Anna-Maria

All supplies I used to create this mini are coming from the previous Studio Calico kits or from the SC digital shop or were buy at the SC shop. Literally – ALL of them 🙂
It was a refreshing change to work with plastic pockets and ready-made cover (you all know how I hate doing covers, right?). To be honest – I can’t wait to make another Instagram book! I just have to find a good event with inspirational photos, I’m sure I will find something like that. This time I will make something in color, totally different mood… oh… if I only have enough time this weekend… Keep your fingers crossed for a creative mind and a bunch of time for me! I wish you all sunny days and big smile 😀

03/09/2014

‚Autocomplete’ event sneaks and informations.

I will start from that I AM SO HAPPY that I can visit Italy once again!!! And it will be an amazing pleasure for me that I will be able to work with my very best friends: Lory & Celine!!!

Prato scrapbooking event
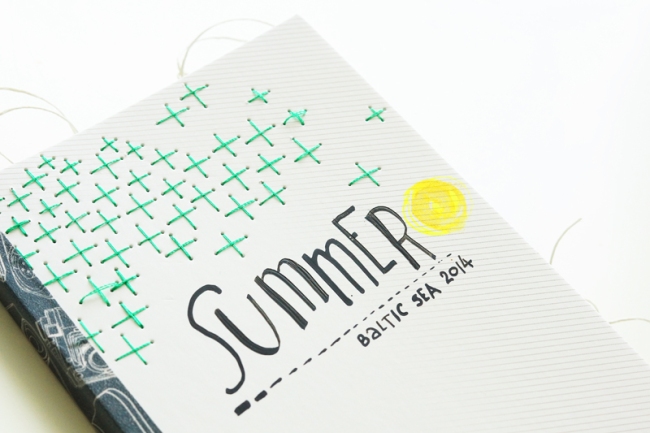
This time I prepare for you a mini-album class. The main subject during classes will be drawing using various nibs and colour inks! Of course I will add some typical for me watercolour elements – especially for those of you who didn’t attend in my February classes in Rome. There will appear some stitching elements as well. We will be playing with the die cuts and letterpress plates. The mini book you will combine during classes will be quite simmilar to my latest ‚Summer – Baltic Sea 2o14‚ project.

The kits will include Studio Calico and October Afternoon supplies, all of you will get a small kit with various nibs. Colour inks for shared use are sponsored by Studio Calico, as well as letterpress plates.

summer mini by AM detail3
This project are best for keeping vacation memories or other happy, sunny moments, please prepare a bunch of various photos in different sizes. They can be squares, ractangles or both; small or big ones, everything will be good [the size of the album will be an A6].

summer mini by AM00

You will also need glue, scissors, various smooth brushes (rather small ones), gesso, mists/ecolines/watercolors/neocolors/gelatos or other watercolour media of your choice, stamps of your choice, needles (with a small and with a big whole inside), paper towel, baby wipes, various ink pads or other things you like to use in your projects. I like when you adding something ‚yours’ to the kits prepared for the classes, it always give that special element which shows ‚YOU’ during classes.

I’m sure that we will spend a great time together. We will be laughing, taking photos, eat italian delicious food (YES!) and many others. This weekend will be magical and I raelly can;t wait to meet you all there in Prato. See ya!

02/09/2014

Acrylic paint for everybody.

Today I would like to introduce you to the new kind of medium available in Studio Calico shop. Since last few weeks you can enrich your creative supplies list with the lovely range of Color Theory acrylic paints. My tiny tubes are already at home and I thought that it would be nice if I will write few words about acrylic paints in general before you will start playing with them, plus – I made a quick tutorial. Here we go!

DSC05269

Few basics – acrylics are water-based paints, which means taht you don’t have to use terpentine to thin the paints and clean your brushes. One big advantage of acrylics is wonderful versality. Using them you can achieve many different effects and a variety of styles. For example you can apply them either very thickly (using f.e. palette knives) or very thinly and all sort of combinations between. The consistency and texture of acrylics can be changed with acrylic medium and gel, or modelling paste and water. You can use them on various surfaces: wood, paper or canvas. Once primed up with gesso acrylics can be applied on almost any surface such as fabrics, cloths, clay, etc… These paints dry so very fast, so remember to squeeze only a small amount out of a tube at a time. Acrylic paint is PERMANENT – so please be careful and watch out on your cloths and furnitures 🙂 Unlike a watercolour the dry paint is insoluble and can be over-painted without any concerns – that’s a good part about they permanent nature (that it can be painted over). And the last basic thing – always clean your brushes when changing to a new colour to avoid mudiness. Before you begin mixing paint, make sure you know the ins and outs of the color wheel (you can get lots of informations from Lisa’s ‚Color Studio’ classes). Knowledge of pigment blending can save you time and frustration, as well as rescue a background from unsightly mistakes.

+      +      +

OK, it should be enough for the begining. I still know lots of various acrylic techniques and I hope I will be able to share them with you one day. Meanwhile I have something easy but eye-catching for all acrylic beginners (and not only) – foil layer.
Once you are not familiar with acrylic paints, you are not sure how they work and you are affraid of ruin the background paper – this method is for you.

DSC05224

Start from the basic composition. Prepare the background, papers, embellishments and paints. In this technique you can paint using brushes, palette knives, finges or you can put the paint directly from the tube – like I did.

DSC05235

You will need a piece of foil (it can be a recycle packaging, plastic bag or a piece of kitchen foil…). I put A5 white paper under my foil to know the area which should be covered by the paint. If everything is ready, you can start appling paint of the foil. It can be totally accidental (but rememebr what I was writting about mixing colours).

DSC05238Now take a brush, or a piece of paper or palette knive (like on the picture), and spread and blend paint a little bit. You can ‚draw’ some lines on it. it’s the easiest way to give an interesting element to this painting. You can also cover the foil with a smooth, thick surface of paint and scratch some words on it…
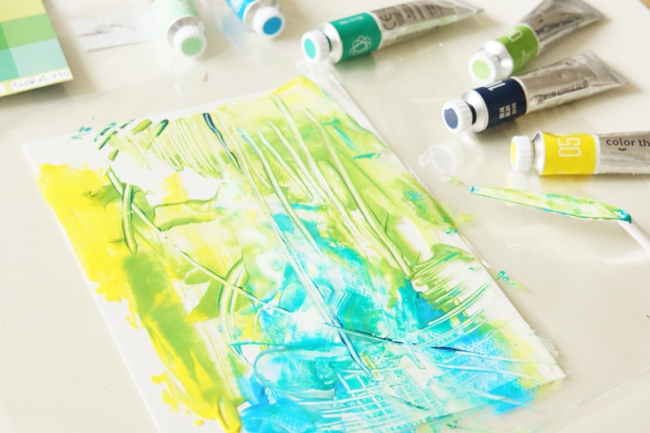
DSC05239

While the painting on a foil is ready (remember you can’t wait to long becasue the paint will be dry), you should take a piece of paper and put your painting upside down. And now – you can make a print using your paiting. You can make it on a random piece of paper and use it later as a layer of your project, you can make a print directly on your background or just leave an excess of paint on a paper…

DSC05243I decided to make a small print and leave it for my future project. I put the foil upside down and I used a brayer to make sure that everything will transfer on a paper. I rolled my brayer over it a couple of times and peel the foil away from the surface. I was left with a print and almost dry piece of plastic bag with fabulous painting on it.

DSC05248

I find this idea very comfortable for all of us. You can use a transparent layer on your project. You can place it wherever you want. There will be no dirt, no blobs of paint – for me it’s a great thing. Of course you can make the same thing directly on a background if you want. Experiment with colours and shapes is fun! Even if you don’t like what you have done it’s not a big deal. Just brush over this ‚mistake’ with gesso. I do this quite often lately 🙂

DSC05256

Coming back to the tutorial. I put few extra layers on a foil (pale patternred paper plus vellum and another white paper). I decided to enrich this project with other techinique – you already familiar with watercolour, aren’t you. This time I was using Color Theory refillers instead of custom watercolours – they worked great!

DSC05259

When watercolour part was totally dry I put it into the the letterpress station and make a ‚hello’ print using black ink (of course you can’t see this letterpress effect on the picture, but believe me it looks sooo good).

DSC05260

Now it’s only few staps to the end. Stick everything together, combine the layers, add embellishments and pictures, glue the title… I used those lovely wood veneer alphabet from the ‚Whitman’ scrapbook add-on, but I coloured it using black marker.

how YOU doin'

That’s all. It was easy, right? 🙂 The technique is for everybody. It isn’t stressful at all. It’s quick and looks spectacular. Have fun! I am waiting for your own trials! If you have any questions please ask them in the comments below this post.

how you 1
supplie list: ‚Poet Society’ scrapbook main kit, ‚Dickinson’ and ‚Whitman’ add-ons, vellum, Color Theory acrylic paint, Color Theory refills, palette knives, letterpress ‚hello’ plate, letterpress balck ink, letterpress brayer.

+      +      +

10609630_691209110965528_541684009703693049_n

I have also some good news for those of you who are still on the fence about starting your monthly Studio Calico subscribtion. Now if you decide to be a member of our community you will receive FREE addon! Remember to use the promo code: FREEADDON at the checkout. Join us >> now <<.

freeaddon