21/06/2015

Sunday sketch challenge made with ‚Galileo’ kits.

Hello everyone! Today we have three new sketches at the Studio Calico blog – as usually based on a layout, card and project life spread. This time I chose this fabulous PL spread designed by Tina Aszmus as a base for my own project.

PL_Main_original

I decided to create a double page with a big photo of my fabulous princess and her favourite toy – Beata. All of the materials I used are coming from ‚Galileo’ scrapbook kit and add-ons…

beata

plus – ‚Europe‚ craft die which I truly adore. When you will be watching details you will probably spy some ‚Galileo’ printables, upcycling glasine envelope and various stamps.

beata 1

beata 2

beata 3

beata 4

I encourage you to use various sketches for your creations. It’s interesting to create a card based on a layout sketch or for example a journal card based on a card sketch. Try it! Give it a chance – if not now, maybe next time. Have fun! We are waiting for your creations in a Studio CAlico gallery till Saturday!

19/06/2015

‚Galileo’ :: late June gallery

june_reveal_banner_v7

‚Shame on you!’ – yep, you can use this phrase instead of ‚hi!’. I am so lazy when there are more sunny days out there! This is true, I hate writing posts, sitting in front of the computer when I can spend more time outside, but I bet that you have simmilar feelings. Even if I am soooooo bad lately – I prepared a short reveal post for you. Besides –Galileo‚ kits are still available in the Studio Calico shop so you are not late to the party if you will enojoy my projects and those fabulous exclusive supplies I used to create them.

June-_PL_MAIN-8517

This is my [main kit only] project which was combined with the products from the photo above, based on my favourite June’s patterned paper ‚the begining/the end’.

an ordinary Sunday

And here are two projects – mix of add-ons. One of them you already know from my ‚start to finish’ tutorial and the second – which can be new for some of you:

joie de vivre

nom nom nom

Soon I will post an extra layout made with ‚Galileo’ goodies to give you more inspiration to create your own projects.

15/06/2015

‚From start to finish’ with ‚Galileo’ kits!

june_reveal_banner_v7

Welcome everybody! This is my start to finish creative process which I documented during my work with the Galileo scrapbook kits this month!

Galileo add-ons!

I know, you already know these kits very well, but since Studio Calico has more sets to buy, I can feed you with inspiration during whole month becasue all of these kits are still available in the shop, I think this is so cool! ‚Saturn‚, ‚Jupiter‚ and embellishment extra ‚Venus‚ are waiting for you >>> HERE.


DSC09691

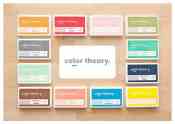
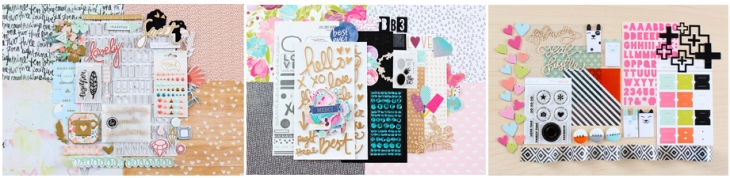
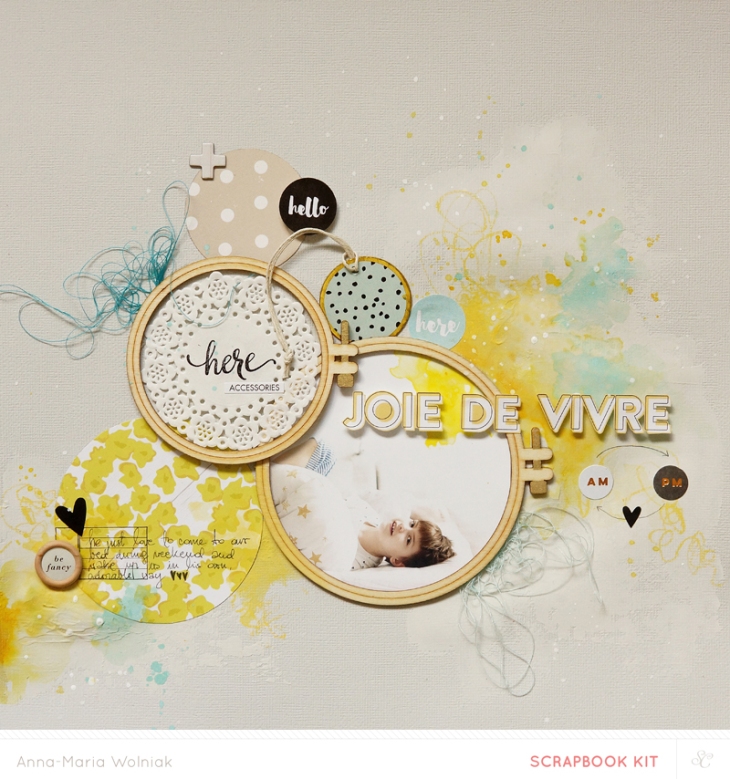
Before beginning – I gathered some of my favourite embellishments and papers that I knew I wanted to use in my project. I put a lot of focus on the color palette (the adorable mix of pale yellow, grey and blue) in the kits. The wood veneer hoops from the Jupiter add-on were my inspiration, and they were also the main part of the composition of this layout.

DSC09693

Because I decided to use these hoops, I knew that my composition should be based on a circle. I grabbed various circle embellishments and Galileo printables from my June box, I cut few circles from the patterned papers and I tried to build a basic composition on my cardstock. Those tiny doilies from the Saturn add-on were also perfect for this layout.

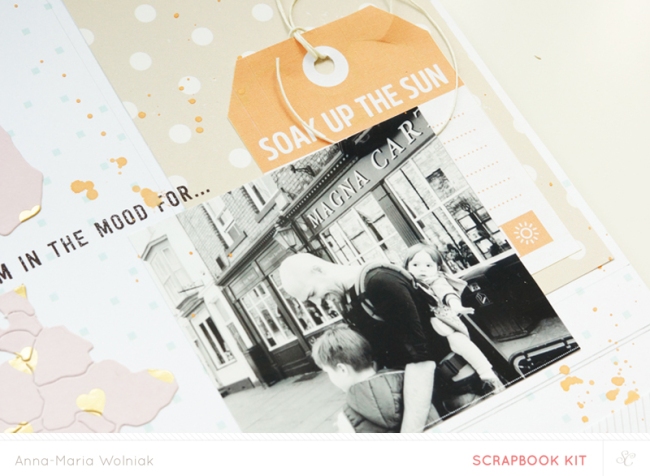
Among the monthly printable cards designed by Geralyn Sy of In a Creative Bubble, I found the perfect words for my title. I decided to cut them from the journaling card using these precision scissors (BTW – I love them!).

DSC09696

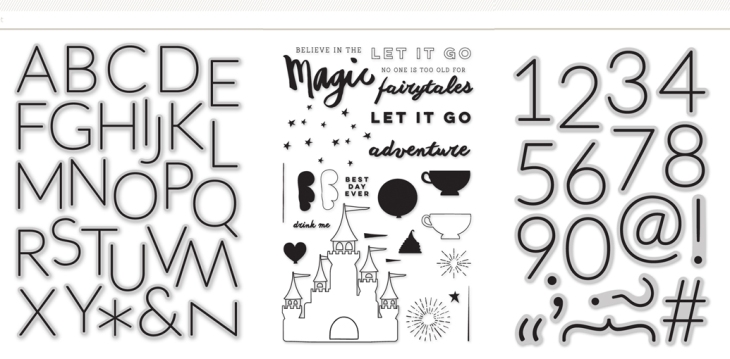
My next step was to embellish the doily (which perfectly fit the middle hoop from the set). I chose a here stamp from Jupiter to create something more interesting than only a blank white doily. You can use any other stamps you have at home; I’m sure that all your round stamps will be perfect as well! ( Maybe even better!)

DSC09702

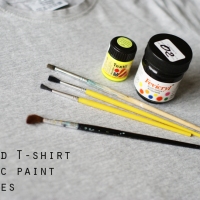
When the basic composition was adhered to the background, I covered some areas near the circles using white gesso (you can also apply a thin layer of modeling paste, depending on what do you have at home). I need this thin layer of protection because as usual in my projects, I wanted to create a few watercolor splashes here and there. When the background layer was totally dry, I started playing with Transparent Watercolor Papers and Neocolor II crayons. I chose shades that fit my color scheme, which you can find on the patterned papers or embellishments I mentioned earlier when talking about the color palette of this layout.

DSC09705

DSC09707

When the paint was dry, I used dimensional foam tabs to adhere the title. I really love the 3D effect I get when I use those foam tabs.

DSC09708

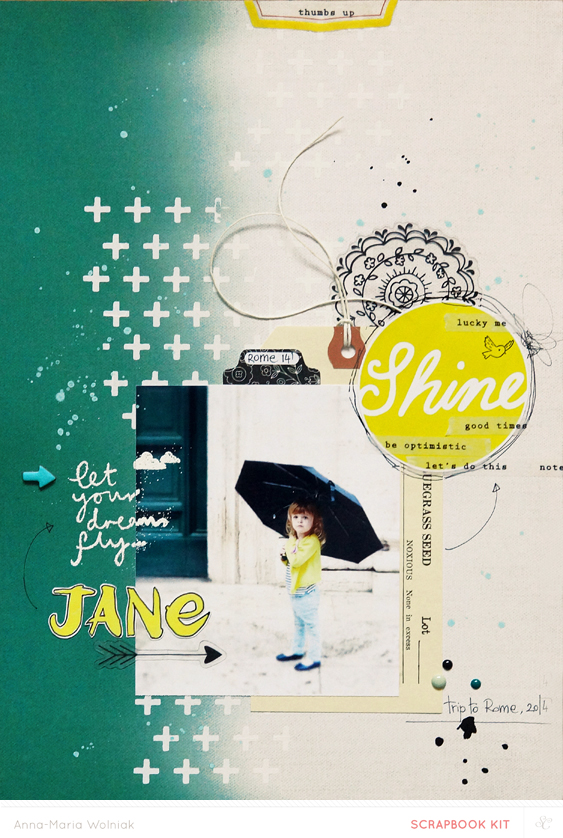
When I thought that my layout was almost finished, I decided to add one more thing to it. Those hoops reminded me that I should use a thread… somewhere… I tangled a few pieces of blue threads and glued them here and there – this is how you can enrich your compositions 🙂

DSC09712

And the end of my work I stuck few embellishments from the scrapbook kits and voila – the „hoop” layout was ready to upload it to the Monthly Gallery.

joie de vivre


I hope you feel inspired and you can’t wait till you will be able to create your own version of such project. Maybe you will use the same colour scheme, maybe you enjoy the watercolour technique or… maybe you still have some wood veneer hoops in your drawer?

IN CASE YOU MISSED IT… SUBSCRIBE FOR $5

SC_NewSubPromo-Reminder_v01_02

In case you missed it, we’ve got a cool deal going on through June 26! Start a new subscription with the Galileo kits for only $5 + get free shipping*! Craft all the stories of summer with pretty kits that have everything you need to remember family vacations, trips to the pool, sunny day outings, summer treats, and anything else worth documenting 🙂

SC_NewSubPromo-Reminder_v01_03

Use the codes SCRAP5 for Scrapbook, POCKET5 for Project Life®, and CARD5 for Card (codes correspond to the type of subscription you’d like to start).

*Please note: This offer is not applicable on add-on kits. Free shipping valid for domestic orders only. Offer ends 6/26/15 at 11:59 pm EST. First kit for $5 offer valid only on new subscriptions started with Galileo kits and requires a 6-month commitment. Add the Galileo kit to your cart and the corresponding promo code. Early subscription cancellations are subject to $15 termination fee. Not valid on previous purchases. Must enter promo code at checkout. Refunds will not be issued for misused or non-entered codes.

27/04/2015

Carolina Moon reveal!

I know… I am a rare guest here lately, so sorry! It’s all about this beautiful weather, the sun and my new hobby… Yep, I finally start running 🙂 I really can’t believe that after only two months I can run over 7km (of course in a comfortable pace, but always; that counts, right?!). So this is it, this is what fill my days, running, biking, swimming… and it feels so good! I have to admit that it’s hard to stay at home and scrap. I am deifinitely a ‚polar’ scrapbooker. I love sitting over the goodies during long and dark autumn and winter evenings. But… there is always such day during every month when my heart start beating quicker than usually. This is the deliver day! I LOVE receiving Studio Calico boxes! This time the box was full of Carolina Moonscrapbook kits and add-ons which are truly inspiring.


image

This is the picture of the Main ‚Carolina Moon‚ Scrapbook Kit. The characteristic elements are: bold, gold/copper alphabet, lovely pink paper with copper polka-dots patter, black and white goodies and simple red heart. Below you can see my main kit only project:


cut happens

I was inspired by this oryginal ‚copper feeling’ and extremely awesome digital printables designed like usually by Hello Forever and Creeative Bubble. You can find all this month’s printables >>> HERE. The exclusive patch says that ‚Art Happens’, I deleted the word ‚art’ and replace it with a word ‚cut’. The photo was made just after my hair cut session in March and this is how this black and white patch inspired me 🙂 it was the begining of the story of this layout.


addons

‚Carolina Moon’ scrapbook add-ons. Let me introduce you to the subtle Dean which in my opinion has most beautiful patterned papers from the all available add-ons, fancy round stamps (which give you lots of various possibilities to use them) and great exclusive circle wood veneers and plastic words. Meet ‚Frank‚ – energetic one with celebration feeling! I adore this giraffe motive in the stamp set and on a vellum transparency, and those fancy, magenta letters – so fun! And ‚Katharine‚ – at the end of our jouney. The most bright point of this add-on are transparecies, label stickers (I love them so much) and those ‚jelly’, colourfull hears. You can choose what you like most or you can get them all this evening 🙂


And now it’s time for the mix of add-ons projects. This month I made two but unfortunately I used very simmilar photos and therefore… I made a kind of double page.

Lincoln double

Both of them were inspire by the colours from the pictures made during our latest family trip to England – in beautiful old town – Lincoln.

Lincoln I

I grabed few patterned papers in simmilar mood, added a piece of exclusive washi tape, transparencies and my favourite – Tilley‚ alpha stamp set!

Lincoln II

03/04/2015

Lisse Street reveal

apr_reveal_banner_final

I am a little bit late this month with a reveal post. (…) I wrote here few phrases but I quickly removed them becasue I realized that there is nothing good enough to write… anyway, coming back to the layouts – Lisse Street April’s kits…

bday high hopes

I promise to add few sentences here later… I will write about all these fabulous supplies I used and colours, and stamps… Now I just don’t have time. I’m leaving to England with my super boys for Easter (and few days more) to our dearest friends. I hope we will rest a little bit and we will run away from this weird, Polish, wintery weather (this is something strange that it’s snowy here at the begining of Easter… we even didn’t have snow here during Christmas!!!). Well, I will write when I get some wi-fi there or just after when I will come back…

love you mom
I wish you all happy Easter and beautiful, sunny weather this spring!

27/02/2015

Odyssey reveal!

odyssey-banner

February is such a short month and I really love that. It means that March – the first spring month – will be here in a minute! And Odyssey March reveal at Studio Calico is NOW. What should I write about these kits… I think they are one of my favourites what doesn’t shocked me at all becasue all March kits are my fav. during all year. Odyssey‚ scrapbook main kit is so inspiring, full of my favourite shades, travel and outdoor themes, great embellishments, exclusive pattern papers… I was so inspired by all of these elements, just take a look:

March-_SB_Main-7242

Inside you can also find fabulous roller stamp with Kal Barteski’s brush script! I didn’t use it on my pages becasue we didn’t know at the begining of our CT work if it finally will be placed in the kit. So it’s a shame that I don;t have it on my layout; I will use it next time for sure!

This is my main kit project inspired by an old sketch. I used here almost all March exclusives plus – I added watercolours in the centre of the layout, I cuted the Europe map from the patterned paper and I covered the photo using vellum stripe – I have no idea why, but I did that.

sushine


This month I made two layouts where I mixed the main kit with scrapbook add-ons: ‚Penelope‚, ‚Athena‚ and ‚Calypso‚. I love them all but my deifinitely most favourite is this amazing Laina’ Alpha stamp set!!! I used it in both projects.

Odyssey add-ons


birthday boy

This layout was inspired by the awesome cactus illustration by The Aestate and T-shirt print which I found on Pinterest. I printed a huge photo on a vellum and added ‚B-day’ topic made with ‚Laina’ stamps. See this fancy washi tape at the top? it’s part of Calypso‚ add-on which is not only for cats&dogs lovers 🙂


Prague


Odyssey stamps

LAINA                                                       FAIRY TALE                                                ARCH


29e6b2b9626c1c87b8f4236b_650x718

Remember about this month’s digitals, they are all available to download at the Digital Studio Calico shop >>> HERE.


March_Reveal-_Tina_Kit-7461-2

And of course – exclusive Tina Aszmus’s Mini Book class kit! You can sign up for this class (to be true, I feel that this chapter of Mini Book Library will be the best one) 🙂
These and many many other kits and journaling card sets, stamps, etc… you will find at the Odyssey‚ official page >>> HERE.

01/02/2015

I love my work :: Studio Calico weekly sketch

Hi everybody! I have an honour to share first February sketches with Cirque‚ kits.

a7ebf770a3e649875ab59027404a39b64cd7a595

I chose to work with a scrapbook sketch based on April’s layout. I love simple sketches becasue than you can mess with an example (which in other hand is a perfection). But the idea is to use the sketch and create something in your own style.

my work 1

I was inspired by two things this time: with my favourite ‚Europe map’ stamp and die and by the huge letters which I used to create white on white title (the alphabet is coming from the January ‚Ivy Tower’ add-on).

my work 4

I used the pictures from my last trip to Spain where I was teaching mixed media classes. The layout is about my dreamy scrapbook work, about amazing people I meet in various countries, etc… I just love my job, it incorporates all the things I adore in my life: art, people, travelling, different languages and customs.

my work 2

This layout remind me that my beloved Poland is not that far away from the rest of the beautiful places in Europe 🙂

my work


Wilna-Ads3

The newest Studio Calico workshops – Color Theory – are open up for registration! It’s a FUN workshop where Wilna and the contributors (including ME! yay!) focus on Color Theory (In a super cool way) and we will be mainly working with Acrylic Paints – and some simple and awesome techniques.

By enrolling in this class you’ll receive :

  • 8 technique videos + new projects from Wilna, all featuring cool techniques you can do with Color Theory Paint.
  • 24 projects from our contributors, sharing their take on the techniques. We’ll be featuring layouts, cards, and Project Life® spreads.
  • 8 PDFs sharing step outs and thoughts on the techniques from Wilna and her contributors.
  • Access to a class message board and gallery, where you can share and learn with your teacher and fellow students.
  • Weekly challenges to inspire you to use what you’ve learned.
  • Digital Die Cut files from I Heart Studio

bonus

While supplies last, Color Theory students will receive a set of 4 4x3in silkscreens and one Color Theory Deja Blue Acrylic Paint. This bonus class kit will ship to you FOR FREE, no matter where you are. In addition, ONE lucky Color Theory student will receive ALL 12 Color Theory Paints.

And OF COURSE there will be a lot of free stuff with the class!

specialoffer

When you buy THREE Color Theory items from one kind you will recieve ONE CT item of this kind for FREE! Check out your collection of Ink Pads and Refills and the most important – Acrylic Paints and make a deal with this class!

Not valid on previous purchases and must have Color Theory Class in cart for code to apply. Offer for buy three get one free only valid with purchase from the Color Theory Ink Pads, Paints and Refills section of the shop. Code only applies to three items of the same type, quantities of three can not be mixed between Ink Pads, Refills and Paints. Must enter code at checkout. Refunds will not be issued for misused or non-entered codes. Expires 2/8/2015 at 11:59pm EST. This offer is valid while supplies last.


Don’t miss two NEW fabulous silk screens availbale in the SC shop!!! Set of SCREEN SCRIPT ALPHABET LETTERS and set – LET THE GOOD TIMES ROLL!!!

new silkscreens


28/01/2015

2o14 selfies :: mini album

Today I have something extraordinary inspired by ‚Ringmaster‚ embellish add-on from February Cirque‚ kits and AmeliaSeven Paper upcoming collection.  This is my last year closed in c&s mini album in pink-gold-black and white palette. These are my favourites selfies from 2o14 with some adnotations, memories, etc.

selfie 1

During last year I leaned how to love myself and this is all about this mini. So even if you think that I am weird (to be true – I am), it’s not a narcissistic project. This is something more which is very important for me.

selfie 2

Besides – I used lots of various embellishments and stamps and papers from the ‚Cirque’ scrapbook kits plus my favourite ‚Europe’ stamp + die set and ‚Noah’ stamps! I checked and they are not available anymore on the SC shop, but if you really need them remember that there is always alternative, digital version of both of them in the digital shop >>> EUROPE and NOAH.

selfie 3

27/01/2015

‚Cirque’ reveal!

Feb-Reveal-Banner-Design

Welcome everybody! I can’t believe that it’s February reveal already!Cirque‚ kits appear so fast, I really didn’t use all my ‚Far, far away’ goodies and I was ‚forced’ to work with new ones. Don’t get me wrong – I LOVE February kits! I made a lot of projects and I still would like to combine something in a free time.

Feb-_SB_Main-5083-2_df

I start withCirque scrapbook main kit only project…


under

This is the place where fabulous Ashley’s Goldberg’s acrylic art meet with Anna-Maria’s watercolours, what we can get with this mixture? Yep, a big mess… Someone can says: ‚It’s inspiring’, but probably most of you think ‚nope, it’s just a mess’. No matter what do you think about the final effect, you have to know that I had a lot of fun during the creative process and I trully adore the background paper.


Now two layouts which (I hope) show you my true love to the February’s add-ons: ‚Flying Trapeze‚, ‚High Wire‚ and embellishment ‚Ringmaster’ add-on.

add-ons


The first one was inspired (or you can call it a scraplift if you want) by an amazing layout designed by talented girl – Jill Sprot [HERE is the oryginal project]. During my Pinterest ‚walks’ I found this layout and I knew that I have to make something simmilar, why? becasue of the layers! I adore layers and lately I resign with them with unexplained reasons. I knew that there are lots of fabulous patterned papers in the ‚Cirque’ add-ons and that I should show them to you all in a best way.

all about that base

I knew that I want to use many patterned papers here, this photo in my favourite ThatWay fur, this amazing wood veneer and lovely pineapple stamp (becasue I love pineapples so much). I added lyrics from the song which have been played in a radio during my creative process plus – few old ‚Zara’ labels printed on a vellum.

all 3

I combined everything together using Jill’s layout as an example and fantastic inspiration (thank you Jill once again) and that’s it! I made a perfect layout, I made a dreamy project which I adore 🙂 I know, I’m not modest right now, not humble at all, but I really like the effect I get.


The second add-on project was inspired by fabulous and well known Noah‚ alphabet stapms! Yep! They finally appeared once again at Studio Calico, I was waiting for them for a few years. I found a good picture and created a linear composition.

little books

I filled the project with various patterned papers, embellishments and stamps. I recycled glasine and plastic bags and used them as layers under the transparent moon. If you look at the left side you can spy a piece of Europe‚ stamp and die set.

little 1

I adore this set! First of all I stamped ‚Europe‚ (funny… 🙂 ) and after I covered it with a piece of pink patterned paper from which I cuted out the map – using ‚Europe‚ die of course. And I repeated it many times because I made other project using this set, and this is not the end of this friendship 🙂 I keep my fingers crossed for all of you who want to buy this and I hope that SC made enough sets. But if… if you won’t be lucky enough to get this stamp+die set you can always purchase the digital version of it >>> HERE.


Usually I don’t use any extra papers, but this time I have to admit that patterned papers in the February’s kits are fabulous. Usually both sides are awesome so it’s obvious that I need (probably you too) more than only one paper from the kind. These are the close ups on all the extra papers from ‚Cirque’ kits. Extra exclusives and beloved brands from the new lines >>> ‚More Patterned Paper‚ and ‚Add-on Patterned Paper‚.

patterneed paper


Of course there is a bunch of digital items in the shop (this month I didn;t use them becasue I had some problems with computer and printer, etc… but they are great – as always). Check out the digital shop >>> HERE.

9c0aced2838219e24287b72b_650x715

20/01/2015

From start to finish tutorial :: silk screens.

 Today I would like to show you my start to finish course using Far, far Away‚ kits. In this tutorial I show in how many different ways you can use your silkscreens from the JanuaryMagic Carpet‚ add-on. I also added a little tip how to create a title using fabulous ‚Mia‚ (or ‚Alyra’) alpha stamps.


DSC06411
Let’s begin. First of all we have to prepare all basic supplies like papers,embellishments, Color Theory acrylic paint, ink pads, stamps and a photo – of course.


Talking about the photo – this little lady on a picture… adorable, isn’t she? This is Jane, beloved daughter of our fabulous Paige Evens 🙂 She ‚borrowed’ me this picture to scrap when I wrote on her Instagram how inspired I am looking at these amazing colours.


DSC06415
OK – coming back to the point. I cuted 12×12 ombre paper to the A4 format – this is one of my favourites lately. I decided to use this outstanding ‚+’ silk screen and white acrylic paint to create a background pattern. This is easy. As you already know you don’t need anything more than acrylic paint (or gesso), a piece of thick cardboard or an old credit card or a palette knive. Just stick the silk screen into the place of your choice (I chose the edge between green and white area in the centre of ombre) and spread the paint.


DSC06417
I repeated it for a few times becasue my intention was to blend both sides of the background.


DSC06421
During this time when the backgournd is drying we can create an extraordinary embellishment using the second ‚shine’ silk screen. I took a piece of white cardboard (I think that it was a piece of paper from the stamp’s pack…) and my favourite acrylic ‚Sunny Day‚ paint. I repeat the same action – stick the silk screen to the background, spread the paint, remove the screen from the paper and clean it immediately. I think this is very important to clean the screens just after use becasue than you can be sure that all of these little holes will be clean, and if they will be clean than your prints will be better, cleaner and sharper. So take care of your silk screens, they deserve to be clean 🙂

DSC06452


OK, the background and the embellishment are ready, how we can use the third ‚HELLO’ screen? I think that the perfect way is to use it as a title! Yes, I think this is a good idea and I recommend you to try this technique on a layout, however this time, I decided to create a different title for my project. In my cretive team box I received the fabulous ‚Mia’ alpha stamp, when I saw it I knew that I have to use it somewhere. I decided to use it on this layout and I knew that I want to get bright, yellow letters. Usually it’s impossible to stamp yellow motives on a dark surface and keep them bright, so my first thought was to stamps it on a white cardboard.

DSC06424


And that’s what I did. I stamped my title on a white paper (so sorry for these ugly pictures but durign winter months in Poland it’s dark in the afternoon, so I used an artificial light).

DSC06428


Next I contoured the letters using thin, black precision pen
… and I cuted all these letters separately using tiny, precision scissors.

little Jane 2


I started to stick the photo and other elements to the background.

DSC06436


During the combining process I thought that it would be nice if I add a phrase stamp – also from the ‚Magic Carpet‚ scrapbook add-on. Once again – I knew that it won’t be satisfactorily visible on a dark green background so it was a quick decision – I used white embossing powder. I adore to mix various techniques like here – stamping, masking, paint, embossing, layering… the mix of all these actions give a special feeling to the project, especially when you look at it in real life.


little Jane in the rain
This is it. You can check looking at the final layout how I placed the embellishments and how it works together on a surface. I always think about blending elements, I like when everything create one, harmonious totality.
I hope you felt inspired. I think that I show you that you can use three different silk screens in three various ways (and probably far more…). Don’t be affraid. this is not a dirty hobby. I am a mixed-media scrapbooker but believe me – I don’t like dirty hands. You can be mixed-media and clean (and happy). Just take care of your tools and everything will be easy.
I wish you a happy day full of silk screens actions 🙂