Archive for Styczeń, 2015

28/01/2015

2o14 selfies :: mini album

Today I have something extraordinary inspired by ‚Ringmaster‚ embellish add-on from February Cirque‚ kits and AmeliaSeven Paper upcoming collection.  This is my last year closed in c&s mini album in pink-gold-black and white palette. These are my favourites selfies from 2o14 with some adnotations, memories, etc.

selfie 1

During last year I leaned how to love myself and this is all about this mini. So even if you think that I am weird (to be true – I am), it’s not a narcissistic project. This is something more which is very important for me.

selfie 2

Besides – I used lots of various embellishments and stamps and papers from the ‚Cirque’ scrapbook kits plus my favourite ‚Europe’ stamp + die set and ‚Noah’ stamps! I checked and they are not available anymore on the SC shop, but if you really need them remember that there is always alternative, digital version of both of them in the digital shop >>> EUROPE and NOAH.

selfie 3

27/01/2015

‚Cirque’ reveal!

Feb-Reveal-Banner-Design

Welcome everybody! I can’t believe that it’s February reveal already!Cirque‚ kits appear so fast, I really didn’t use all my ‚Far, far away’ goodies and I was ‚forced’ to work with new ones. Don’t get me wrong – I LOVE February kits! I made a lot of projects and I still would like to combine something in a free time.

Feb-_SB_Main-5083-2_df

I start withCirque scrapbook main kit only project…


under

This is the place where fabulous Ashley’s Goldberg’s acrylic art meet with Anna-Maria’s watercolours, what we can get with this mixture? Yep, a big mess… Someone can says: ‚It’s inspiring’, but probably most of you think ‚nope, it’s just a mess’. No matter what do you think about the final effect, you have to know that I had a lot of fun during the creative process and I trully adore the background paper.


Now two layouts which (I hope) show you my true love to the February’s add-ons: ‚Flying Trapeze‚, ‚High Wire‚ and embellishment ‚Ringmaster’ add-on.

add-ons


The first one was inspired (or you can call it a scraplift if you want) by an amazing layout designed by talented girl – Jill Sprot [HERE is the oryginal project]. During my Pinterest ‚walks’ I found this layout and I knew that I have to make something simmilar, why? becasue of the layers! I adore layers and lately I resign with them with unexplained reasons. I knew that there are lots of fabulous patterned papers in the ‚Cirque’ add-ons and that I should show them to you all in a best way.

all about that base

I knew that I want to use many patterned papers here, this photo in my favourite ThatWay fur, this amazing wood veneer and lovely pineapple stamp (becasue I love pineapples so much). I added lyrics from the song which have been played in a radio during my creative process plus – few old ‚Zara’ labels printed on a vellum.

all 3

I combined everything together using Jill’s layout as an example and fantastic inspiration (thank you Jill once again) and that’s it! I made a perfect layout, I made a dreamy project which I adore 🙂 I know, I’m not modest right now, not humble at all, but I really like the effect I get.


The second add-on project was inspired by fabulous and well known Noah‚ alphabet stapms! Yep! They finally appeared once again at Studio Calico, I was waiting for them for a few years. I found a good picture and created a linear composition.

little books

I filled the project with various patterned papers, embellishments and stamps. I recycled glasine and plastic bags and used them as layers under the transparent moon. If you look at the left side you can spy a piece of Europe‚ stamp and die set.

little 1

I adore this set! First of all I stamped ‚Europe‚ (funny… 🙂 ) and after I covered it with a piece of pink patterned paper from which I cuted out the map – using ‚Europe‚ die of course. And I repeated it many times because I made other project using this set, and this is not the end of this friendship 🙂 I keep my fingers crossed for all of you who want to buy this and I hope that SC made enough sets. But if… if you won’t be lucky enough to get this stamp+die set you can always purchase the digital version of it >>> HERE.


Usually I don’t use any extra papers, but this time I have to admit that patterned papers in the February’s kits are fabulous. Usually both sides are awesome so it’s obvious that I need (probably you too) more than only one paper from the kind. These are the close ups on all the extra papers from ‚Cirque’ kits. Extra exclusives and beloved brands from the new lines >>> ‚More Patterned Paper‚ and ‚Add-on Patterned Paper‚.

patterneed paper


Of course there is a bunch of digital items in the shop (this month I didn;t use them becasue I had some problems with computer and printer, etc… but they are great – as always). Check out the digital shop >>> HERE.

9c0aced2838219e24287b72b_650x715

20/01/2015

From start to finish tutorial :: silk screens.

 Today I would like to show you my start to finish course using Far, far Away‚ kits. In this tutorial I show in how many different ways you can use your silkscreens from the JanuaryMagic Carpet‚ add-on. I also added a little tip how to create a title using fabulous ‚Mia‚ (or ‚Alyra’) alpha stamps.


DSC06411
Let’s begin. First of all we have to prepare all basic supplies like papers,embellishments, Color Theory acrylic paint, ink pads, stamps and a photo – of course.


Talking about the photo – this little lady on a picture… adorable, isn’t she? This is Jane, beloved daughter of our fabulous Paige Evens 🙂 She ‚borrowed’ me this picture to scrap when I wrote on her Instagram how inspired I am looking at these amazing colours.


DSC06415
OK – coming back to the point. I cuted 12×12 ombre paper to the A4 format – this is one of my favourites lately. I decided to use this outstanding ‚+’ silk screen and white acrylic paint to create a background pattern. This is easy. As you already know you don’t need anything more than acrylic paint (or gesso), a piece of thick cardboard or an old credit card or a palette knive. Just stick the silk screen into the place of your choice (I chose the edge between green and white area in the centre of ombre) and spread the paint.


DSC06417
I repeated it for a few times becasue my intention was to blend both sides of the background.


DSC06421
During this time when the backgournd is drying we can create an extraordinary embellishment using the second ‚shine’ silk screen. I took a piece of white cardboard (I think that it was a piece of paper from the stamp’s pack…) and my favourite acrylic ‚Sunny Day‚ paint. I repeat the same action – stick the silk screen to the background, spread the paint, remove the screen from the paper and clean it immediately. I think this is very important to clean the screens just after use becasue than you can be sure that all of these little holes will be clean, and if they will be clean than your prints will be better, cleaner and sharper. So take care of your silk screens, they deserve to be clean 🙂

DSC06452


OK, the background and the embellishment are ready, how we can use the third ‚HELLO’ screen? I think that the perfect way is to use it as a title! Yes, I think this is a good idea and I recommend you to try this technique on a layout, however this time, I decided to create a different title for my project. In my cretive team box I received the fabulous ‚Mia’ alpha stamp, when I saw it I knew that I have to use it somewhere. I decided to use it on this layout and I knew that I want to get bright, yellow letters. Usually it’s impossible to stamp yellow motives on a dark surface and keep them bright, so my first thought was to stamps it on a white cardboard.

DSC06424


And that’s what I did. I stamped my title on a white paper (so sorry for these ugly pictures but durign winter months in Poland it’s dark in the afternoon, so I used an artificial light).

DSC06428


Next I contoured the letters using thin, black precision pen
… and I cuted all these letters separately using tiny, precision scissors.

little Jane 2


I started to stick the photo and other elements to the background.

DSC06436


During the combining process I thought that it would be nice if I add a phrase stamp – also from the ‚Magic Carpet‚ scrapbook add-on. Once again – I knew that it won’t be satisfactorily visible on a dark green background so it was a quick decision – I used white embossing powder. I adore to mix various techniques like here – stamping, masking, paint, embossing, layering… the mix of all these actions give a special feeling to the project, especially when you look at it in real life.


little Jane in the rain
This is it. You can check looking at the final layout how I placed the embellishments and how it works together on a surface. I always think about blending elements, I like when everything create one, harmonious totality.
I hope you felt inspired. I think that I show you that you can use three different silk screens in three various ways (and probably far more…). Don’t be affraid. this is not a dirty hobby. I am a mixed-media scrapbooker but believe me – I don’t like dirty hands. You can be mixed-media and clean (and happy). Just take care of your tools and everything will be easy.
I wish you a happy day full of silk screens actions 🙂

16/01/2015

‚Cirque’ senak peeks and a bunch of offers…

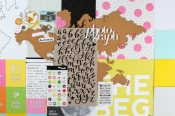
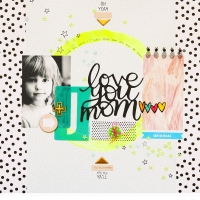
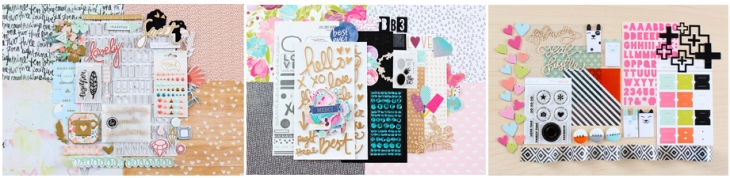
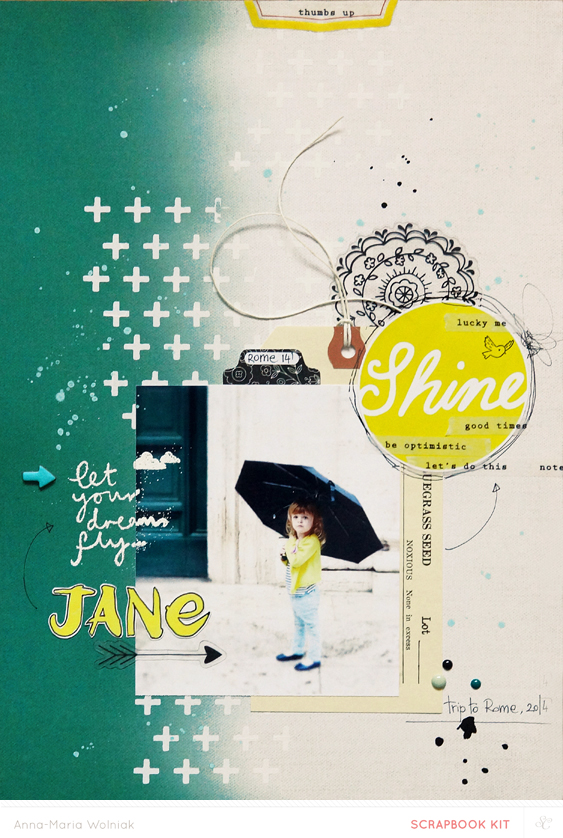
I’m back with a lot of informations directly from the Studio Calico club kit, shop, etc… and of course – with some new sneak peeks! Hmmm… where to start… maybe with sneaks? I know that this is your favourite part, so let’s do this. Last two days I was playing with my CT box full of ‚Cirque‚ goodies. Oh-my-lord! I am in love with them! It was so fun! I made three layout and a mini album and I still have lots of ideas so if time will let me – I won’t hesitate to use them!


Starting with the [main kit only] project… and next the mix with add-ons. The sneaks of mini album will be published in a special post on the ‚Sneak Peeks‚ message board at Studio Calico >>> HERE, soon.

under 4


little 4

all 1


Oh… I would like to show you the whole layouts right now! I can’t wait… I am really happy with them 🙂 The goodies from the kits made them, they just made my projects. If you want to check out more sneak peek photos please move >>> HERE.
An important information for this month is, that…
JANUARY 27th IS THE FULL ‚CIRQUE‚ REVEAL!!!


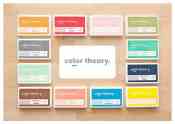
 Ok, now – February exclusive offer for subscribbersCool Copper‚ vellum paper pad!!! This 4×4 paper pad is just one reason we’re crazy about copper! We’ve added the lovely metallic hue to this perfect companion to your crafting. Each vellum page stands out with bold, stylish patterns you’ll love.

sneak offer

This exclusive offer is for subscribers only and will ship with your monthly subscription order with no additional shipping fees, no matter where you are! Available for a limited time while supplies last. This item qualifies for free shipping on its own. The cost of the Cool Copper Vellum Paper Pad will not count towards the free shipping threshold with the other items in your cart.


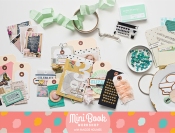
The second offer for subscribers (this offer is open for subscribers now, but it will be available soon for all of us, during reveal night). Not a subscriber? Join us for exclusive discounts and promotions. So what’s the deal? The preorder of new albums: 9×12 and 6×8!!!

SNEAK-SLIDE_album_(1)

I have to say that the Woodgrain 9×12 album stole my heart… Some important answers on your questions coppied directly from the Studio Calico blog…

Will the new albums bundle with kits? No, we want to get these out the door to you sooner than bundling with February’s kits!Albums are scheduled to arrive by the end of next week and we will ship albums out upon their arrival. The albums and shipping charge per album are as follows:

  • Domestic shipping for the 9×12 Album – $29.99 ($31.99 for leather)+ $4 per album shipping fee
  • International shipping for 9×12 Album – $29.99 ($31.99 for leather) + $9 per album shipping fee
  • Domestic 6×8 Handbook – $19.99 + $4 per album shipping fee
  • International 6×8 Handbook – $19.99 + $9 per album shipping fee

Is there a quantity limit to purchase? Nope! Pre-order as many as you ‚d like! Just remember, there will be a small shipping fee for each album ordered.

Will these work like typical preorders? Yep! To preorder pages, just click on the preorder button, and that automatically completes your order (your card will be charged for the album, but the shipping fee will be applied to your order when they actually ship)! If for example you would like five albums, you will just need to click preorder (for the albums you want) 5 separate times, and 5 separate orders are then placed. So if you click it only once, an order is automatically created, so keep this in mind while you’re shopping for your albums.


Of course we shouldn’t forget about page protectors for the albums and handbooks. Multi-pack page protectors ship FREE with your album preorder! As a result of Studio Calico awesome customer inquiries, they decided to put up the multipack of the page protectors (individuals will be available for sale during the Reveal period) with album preorder. SC wanted to put more of them up for sale, but simply didn’t have time and we wanted to be assured of the exact count. The 9×12 multipack will be available here and the 6×8 multipack available here.


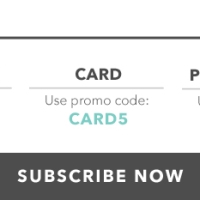
And the very last thing for today. New subscriber great offer! If you read all these previous exclusive offers for subscribers only and you are NOT a Studio Calico subscribber yet, but now you WANT to be a subscribber – this paragraph is just made for YOU 🙂

373bd34add2b3c89c8139f9d_650x448

Start a NEW subscription for only $5!!! What a great deal!!! BTW – if you still don’t have your ‚Far, far away‚ kit it can be the best offer ever for you. On my blog you can find some inspirations made with these kits. I also published From start to finish‚ tutorial made with scrapbook main kit and in a few days I will post a second tutorial made with ‚Far, far Away’ add-ons! (which are still available by the way… if you can please think about ‚Magic Carpet‚ – one of my favourites with THREE silk screens inside!).

13/01/2015

I am – AM :: tutorial.

Hi guys, I know you’ve been waiting two weeks for my ‚Far far away’ tutorials… so sorry, but just after New Year I got sick. Awefully. Inflammation of the cornea of the both eyes plus conjunctivitis… It is really painful. Hurts so badly. But now I’m much better. I can finally look at the screens so I’m back (new me becasue I have glasses! I will show you soon).


OK – first from start to finish tutorial – made with Far far Away‚ scrapbook main kit only (I am deeply IN LOVE WITH this main kit, with all of its patterned papers and exclusive embellishments… those fruity transparencies?! OMG!).

DSC06367


The composition of this layout is really, really easy. First of all I combine all the basic elements on a backgournd – including photo. At the first step I make a decision about the colour palette of my project.
Oh – I forgot. Do you remember my subjective moodboard for December and its middle picture ‚OUI’?

fcc8f40207eb8b9fff30df226bf3b73c

Well – the inspiration comes from this picture. Actually, I was so charmed by its shades and brush strokes! I decided to combine this idea into the layout.


DSC06375

I took a piece of white cardboard, Color Theory acrylic paint and a smooth brush. I was using the colours directly from the tubes (yellow, orange, black), only salmon shade was mixed with a blot of white paint.


DSC06378

I wrote ‚I am’ –  I like this because it also looks like my initials 🙂 Remember that you will get better effect if you won’t repeat the strokes. Try to paint all these lines only once – it won’t be very easy, but it’s not impossible to make. I was not completely satisfied with this effect so I made a second copy using the same colours.


DSC06380

When my acrylic poster was dry I stick all elements of the composition to the patterned background and I add a subtitle below ‚I am’ title. I embellish few places using this lovely, tiny washi tape with happy phrases from the main kit.


DSC06384

I was still missing something. I needed an embellishment which will suit to my palette and mood of the project. Suddently I had an idea… Using various papers from the main kit and exclusive wood veneers I combined an  origami looks like bird (I am not sure if I wrote it properly, I hope you get the point). I cuted few triangles – if you want you can make the same. I won’t give you any measures but it shouldn’t be too difficult if you will focus on it. Start from this ‚not triangle’ figure (the bird’s belly) and the rest should be pretty easy to cut.


DSC06388

When all the elements are ready stick them to the cardboard leaving tiny spaces between the triangles and cut the bird. When my bird embellishment was ready I added few more touches of black – little black dots here & there, you can spy them on a picture above.


I am 1

It’s ok to stick the bird to the background, you can add some 3D foams under to give it a dimmention 🙂 I just added few black splashes and draw a thin arrow. The project is ready.


I am


I hope you enjoy this step by step tutorial. If you like such kind of insirational classes, sketches and not complicated compositions I have an interesting idea for you.


New Studio Calico proposition. ‚On The Grid’ classes leading by on of my favourite scrappers around the world, fav SC teacher and beloved friend – Marcy Penner and her remarkable contributors!

onthegrid-sneak

Save your projects from falling flat – learn how to give each one a solid foundation with On the Grid. Marcy Penner shares her secrets for using a grid based design to create perfectly pulled together projects in a flash. You’ll get Marcy’s expertise in multiple areas to create the perfect base for your projects by exploring using basic grids, playing with design through the use of tags and other materials, and getting out of the square format by experimenting with other shapes or stamps. On the Grid offers the blueprint to success – no heavy equipment needed.